Recipe: Basic Fermented Giardiniera

I am a huge fan of pickles, whether fermented, made with vinegar, or otherwise. "A pickle on every plate" is something that I am wont to say with some frequency. I greatly admire the Japanese art of tsukemono, where pickles are made for every meal (breakfast, lunch and dinner) as well as every course from appetizer to dessert. How sad our meals would be without the relishes, chutneys, sauces and condiments that enhance the dishes of every cuisine. Pickles lend piquancy and flavor, color and contrast, and can balance seemingly disparate ingredients into a harmonious whole. I love pickles.
If you were to ask me what my favorite pickle was, I could not give an answer. The choices are overwhelming.
But if you were to ask me what the platonic ideal of a pickle was I would easily answer: giardiniera.
Today, we too often get our giardiniera from a factory. This is not to say that industrially processed giardiniera isn't good; there have been many a vigorous debate concerning the merits of various regional producers of giardiniera. Indeed, disparaging a particular brand can spark altercations if you are in the wrong neighborhood.But in purchasing our giardiniera from a manufacturer, no matter how good, we forget the unostentatious origins of giardiniera and how delicious and satisfying it can be to make it at home.
From the Italian for "from the garden," homemade giardiniera is a humble pickle. Traditionally, it was often made from whatever vegetables remained from the last harvest of the garden. Un po 'di questo, un po' di quello. A little bit of this, a little bit of that. It is a classic example of sustainability and letting nothing go to waste. It is the very essence of Slow Food.
Pickling is one means of preserving food, protecting it from decay through the use of acid. While there are many vegetables we grow just so we can pickle them, such as Kirby cucumbers, giardiniera is made with what is leftover. It is a diverse medley of remnants preserved so that we conserve the bounty of the land. That is why giardiniera is, to me, the platonic ideal of a pickle and what pickling is all about.
Usually, giardiniera is made with a vinegar-based brine, usually white wine. After all, Italy has produced superior vinegars since the time of Rome, not to mention being the home of the greatest vinegar ever made: aceto balsamico tradizionale. Even today, fine homemade vinegars are far more common in Italy than the US, but that would be another article.
Obviously, you can make an excellent giardiniera with vinegar. But vinegar is acetic acid, which has a sharp bite. As an alternative, sometimes, it is better to have the sour, tangy, tart flavors of lacto-fermented giardiniera; not to mention the usual benefits of lacto-fermented foods such as probiotics, more vitamins, easier digestion, lowering of the blood sugar ... the benefits go on.
It is also very easy.
Basic Fermented Giardiniera
Will make approximately 1 gallon of giardiniera
For the ferment
1 lb Carrots, peeled and sliced on the bias, about ¼" thick
1 lb Celery, sliced on the bias, about ½" thick
2 Bell Peppers, julienne or cut into batons (the more colorful, the better, but any will do)
1 head Cauliflower, cut into bite-size florets
1 medium Onion, julienne
2 cloves Garlic
2 Jalapeños, sliced on the bias, about ¼" thick
For the brine
2 Qts Water (unchlorinated)
3.25 oz Salt (no additives; if the ingredient list is "salt" only, you're good to go)
Procedure:
1. Toss the vegetables until thoroughly mixed.
2. Transfer this mixture to your fermentation vessel, such as a glass jar. An airlock fermentation kit is recommended. Pack firmly without crushing.
3. Add the brine to your fermentation vessel until the vegetable mixture is completely submerged. You may not need all the brine or you may need more, depending on how you packed the vegetables.
4. Place a clean weight (stone, glass, ziplock bag filled with brine) in your fermentation vessel to keep the vegetable mixture submerged.
5. Cover your fermentation vessel with cloth, or a lid that hasn't been completely sealed (to allow the escape of fermentation gasses). Again, an airlock is recommended.
6. Store out of direct sunlight at room temperature for a minimum of four days and up to two weeks while fermentation takes place. The longer the fermentation, the more sour, tangy and tart the fermentation flavors.
7. Refrigerate and enjoy! Fermented giardiniera should last several months in the refrigerator.
Caution: If your giardiniera becomes soft, slimy, grows mold, or develops a disagreeable odor, discard.
This is a basic recipe for giardiniera, but there are many variations. This mix of vegetables is very similar to many of the giardinieras that you will find on the shelf at the grocery store. But, as noted above, that is not what giardiniera is about.
When you are comfortable with fermentation, feel free to experiment with different vegetables, different ratios of vegetables (for example, more jalapeños for a "spicy" mix), or change things up with your favorite herbs and spices. If you have a garden, then use the leftovers. If you shop at the farmers' markets, then make a giardiniera out of the produce you might not finish this week. The only thing you should not change in this recipe is the brine salt/water ratio.
Here is a list of other traditional vegetables you can use in giardiniera: cucumbers (usually sliced), cornichons (usually whole), fennel, pearl onions, broccoli, romanesco, peppers (all sorts), runner beans, eggplant, green tomatoes, zucchini (all summer squash), and okra. Remember though, this is not an exhaustive or exclusive list. Cured green or black olives are also a traditional option for giardiniera, but I prefer to add my olives afterwards, since they are already fermented/cured.
A number of spices and herbs are also common additions to giardiniera, such as, peppercorns, fennel seed, mustard seed, celery seed, coriander, red pepper flakes, capers, dill, chervil and oregano.

Now What?
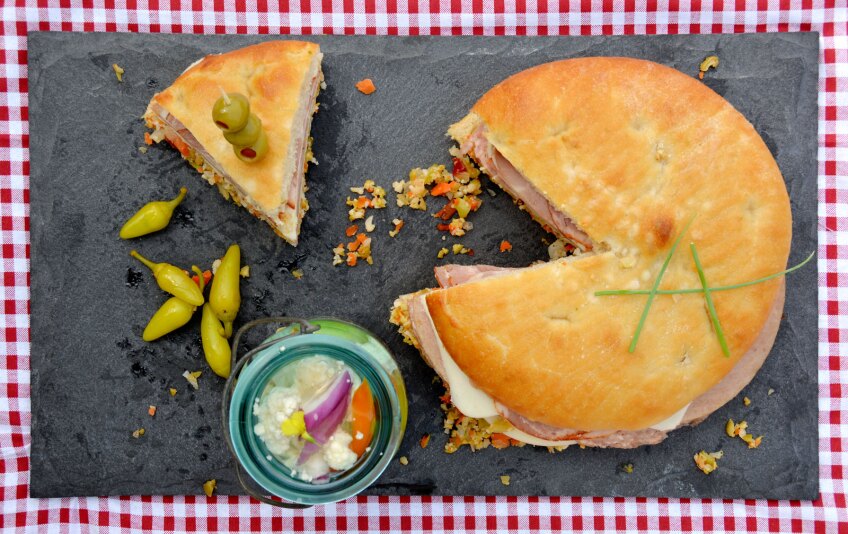
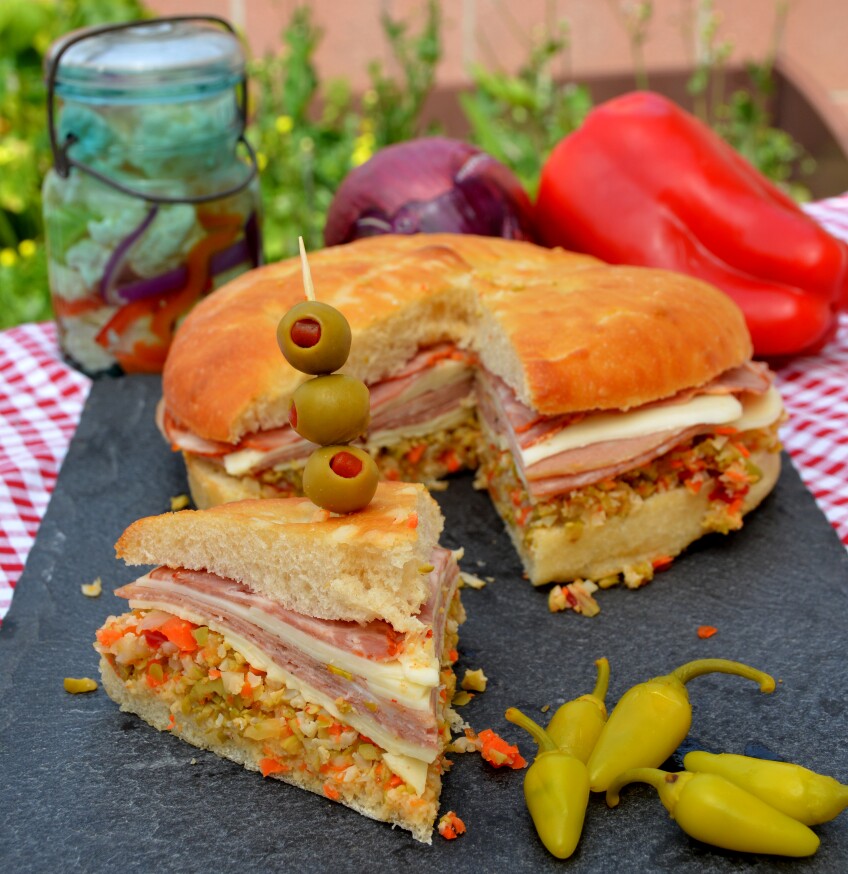
Unfortunately, here in Southern California, giardiniera is not as frequently used as it is in other regions of the United States, such as Chicago, where it is the key ingredient in an Italian roast beef sandwich. Or New Orleans, where it provides the tangy counterpoint to Italian cured meats in a muffaletta. Which, since Lent is now past, is a wonderful lunch indulgence.
Muffaletta
Feeds 4
1 Sicilian Loaf (round) or Focaccia (round)
¼ Cup Extra Virgin Olive Oil, plus additional for brushing bread
8oz Giardiniera, drained (reserve 1 Tbsp liquid)
8oz Sicilian Olives, drained
3oz Mortadella
3oz Cappicolla
3oz Genoa Salami
3oz Provolone
3oz Mozzarella
Procedure:
1. Slice bread through the middle.
2. Finely chop giardiniera and olives together, add olive oil and reserved liquid. Stir to combine.
3. Brush both sides of bread with olive oil and spread a thick layer of giardiniera/olive mix on bottom half of bread.
4. Layer cured meats and cheeses on top of the giardiniera/olive mix.
5. Carefully close sandwich and allow to sit in refrigerator for 15 minutes to one hour.
6. Slice into wedges and serve.
Of course, there are many other uses for giardiniera beyond sandwiches. It is fantastic as a snack, with crudités, cheese plates, salads, antipasto, rice dishes, cured meats, boiled meats, and tuna salad (as well as chicken, egg and potato). Your imagination is the only limit.